| Here are the set of steps to create a simple map.
|
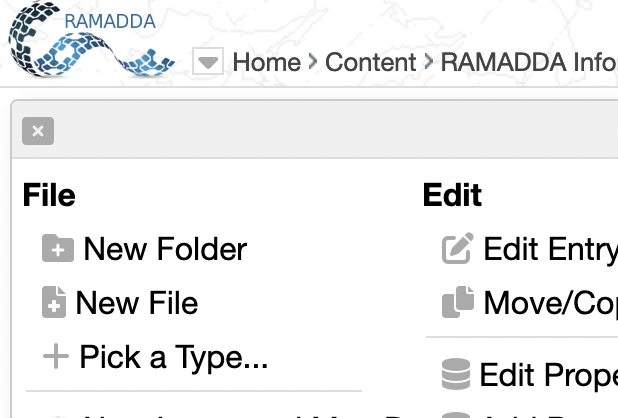
From the entry menu choose "Pick a Type...".
Under GIS Data select "Integrated Map Data":
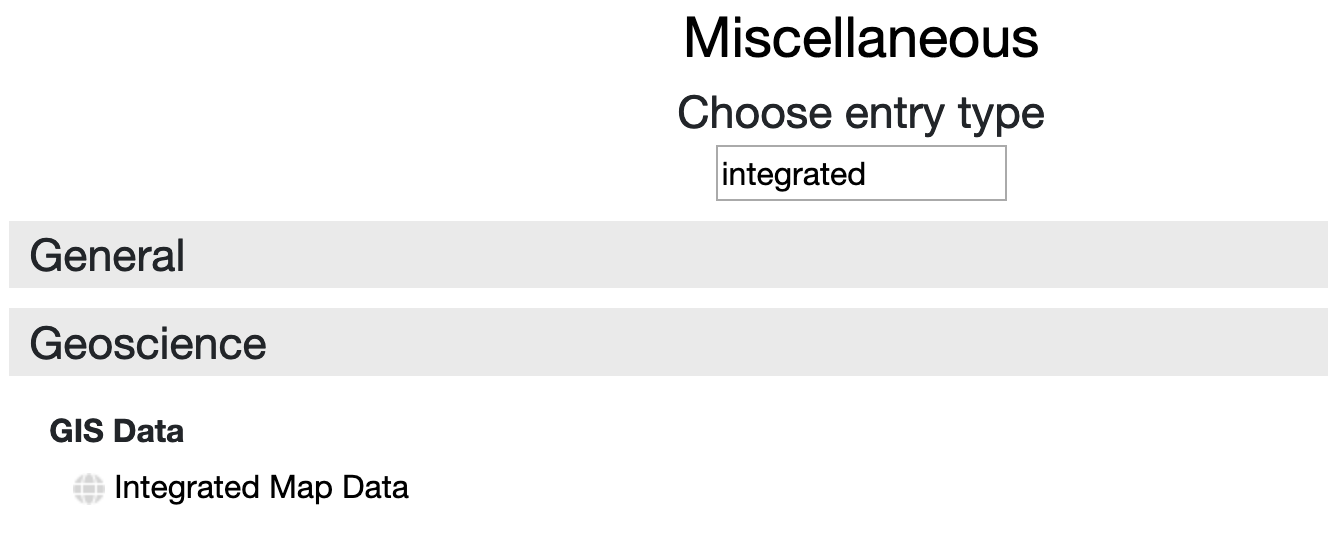 Image 2: New Entry
Enter a name for your map. You can ignore the file. Enter some description.
Note: the description is wiki text.
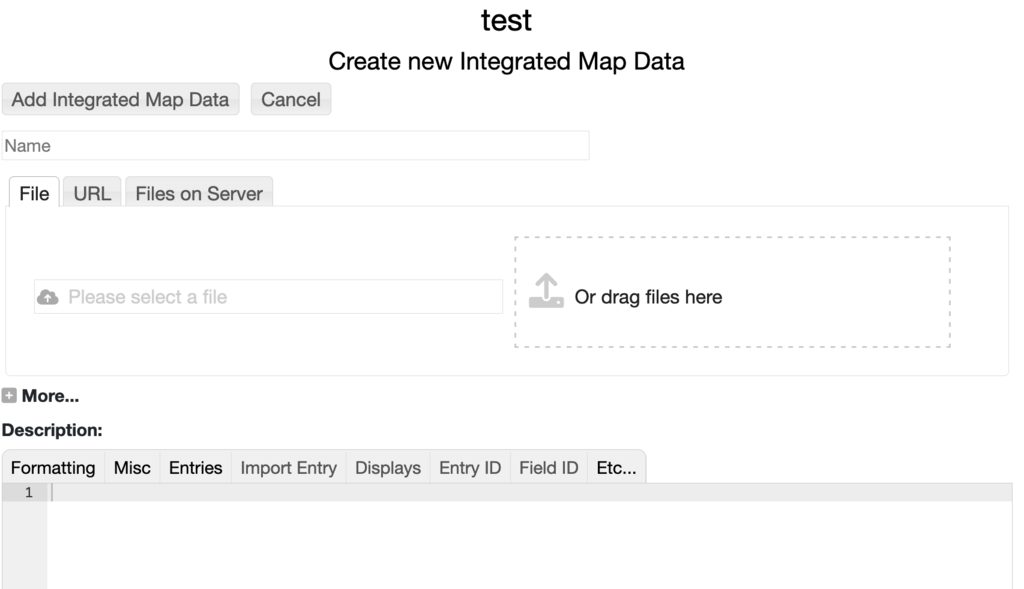 Image 3: New Map Form
Once created you will have the initial display below.
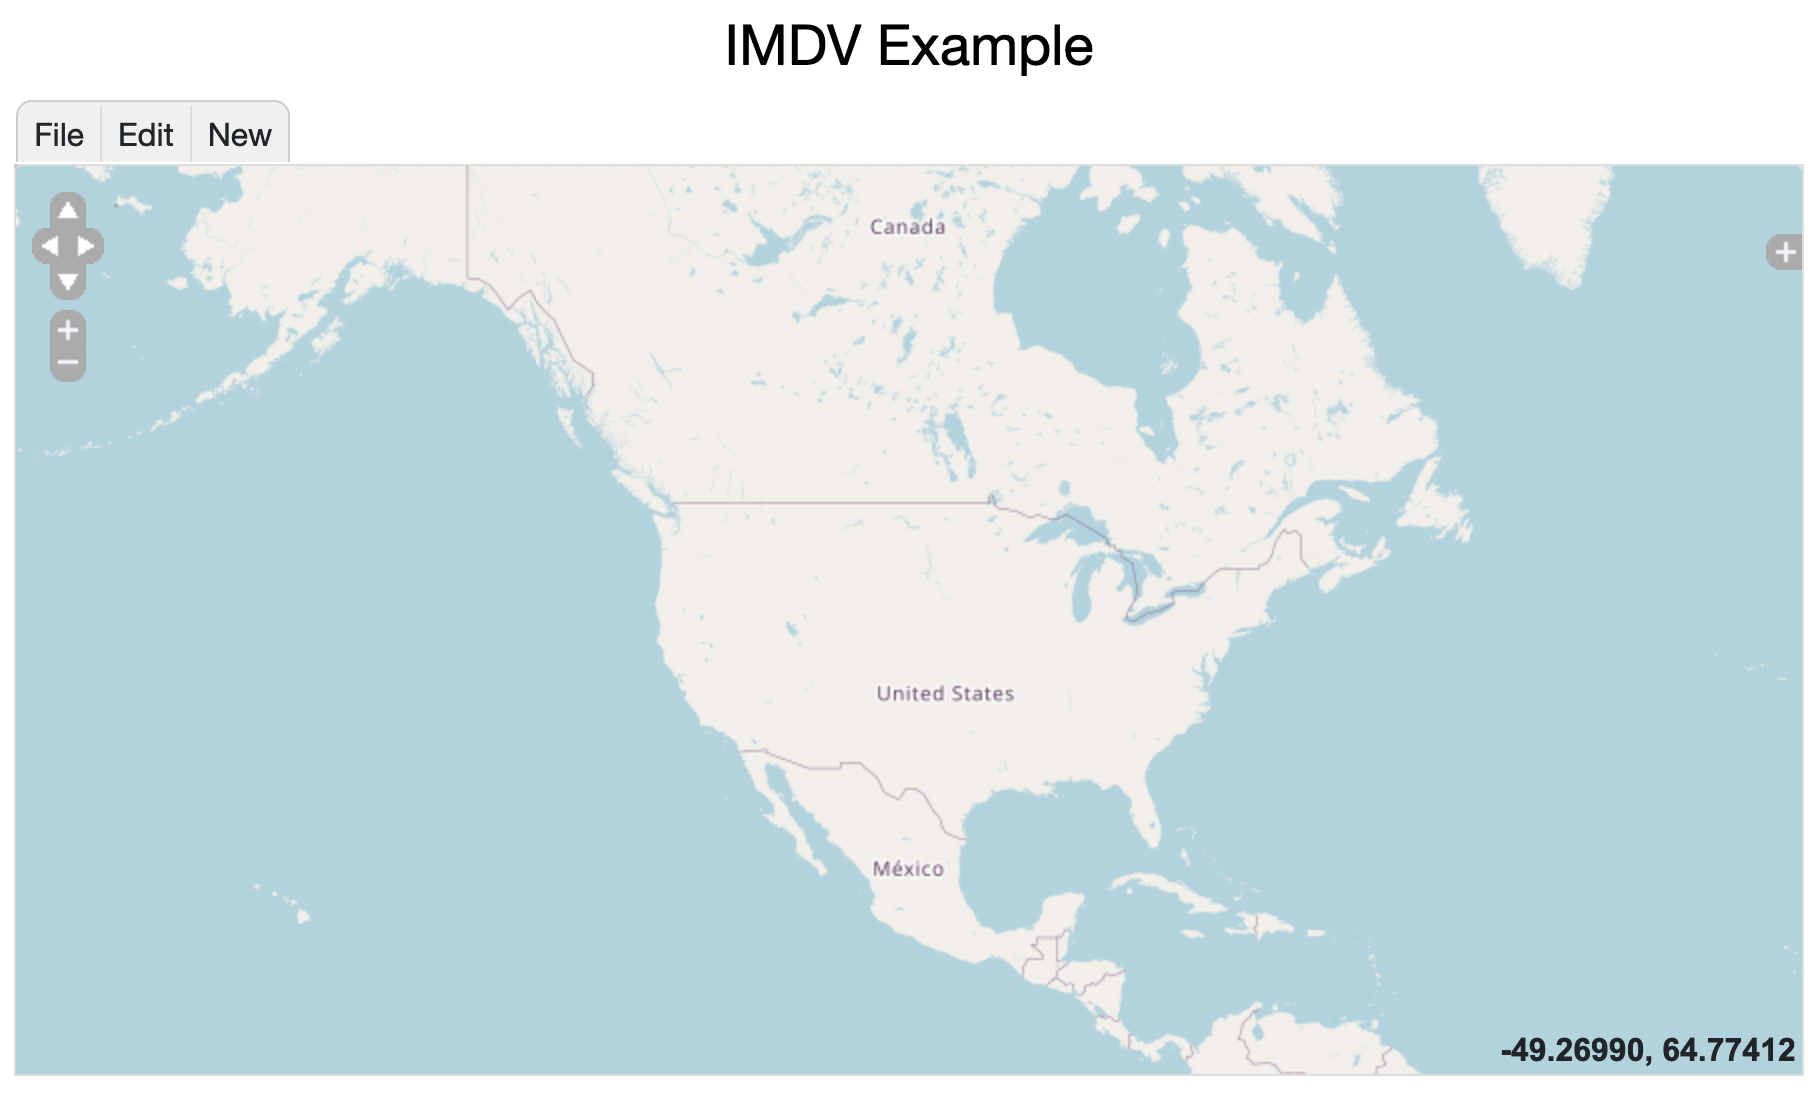 Image 4: Initial Display
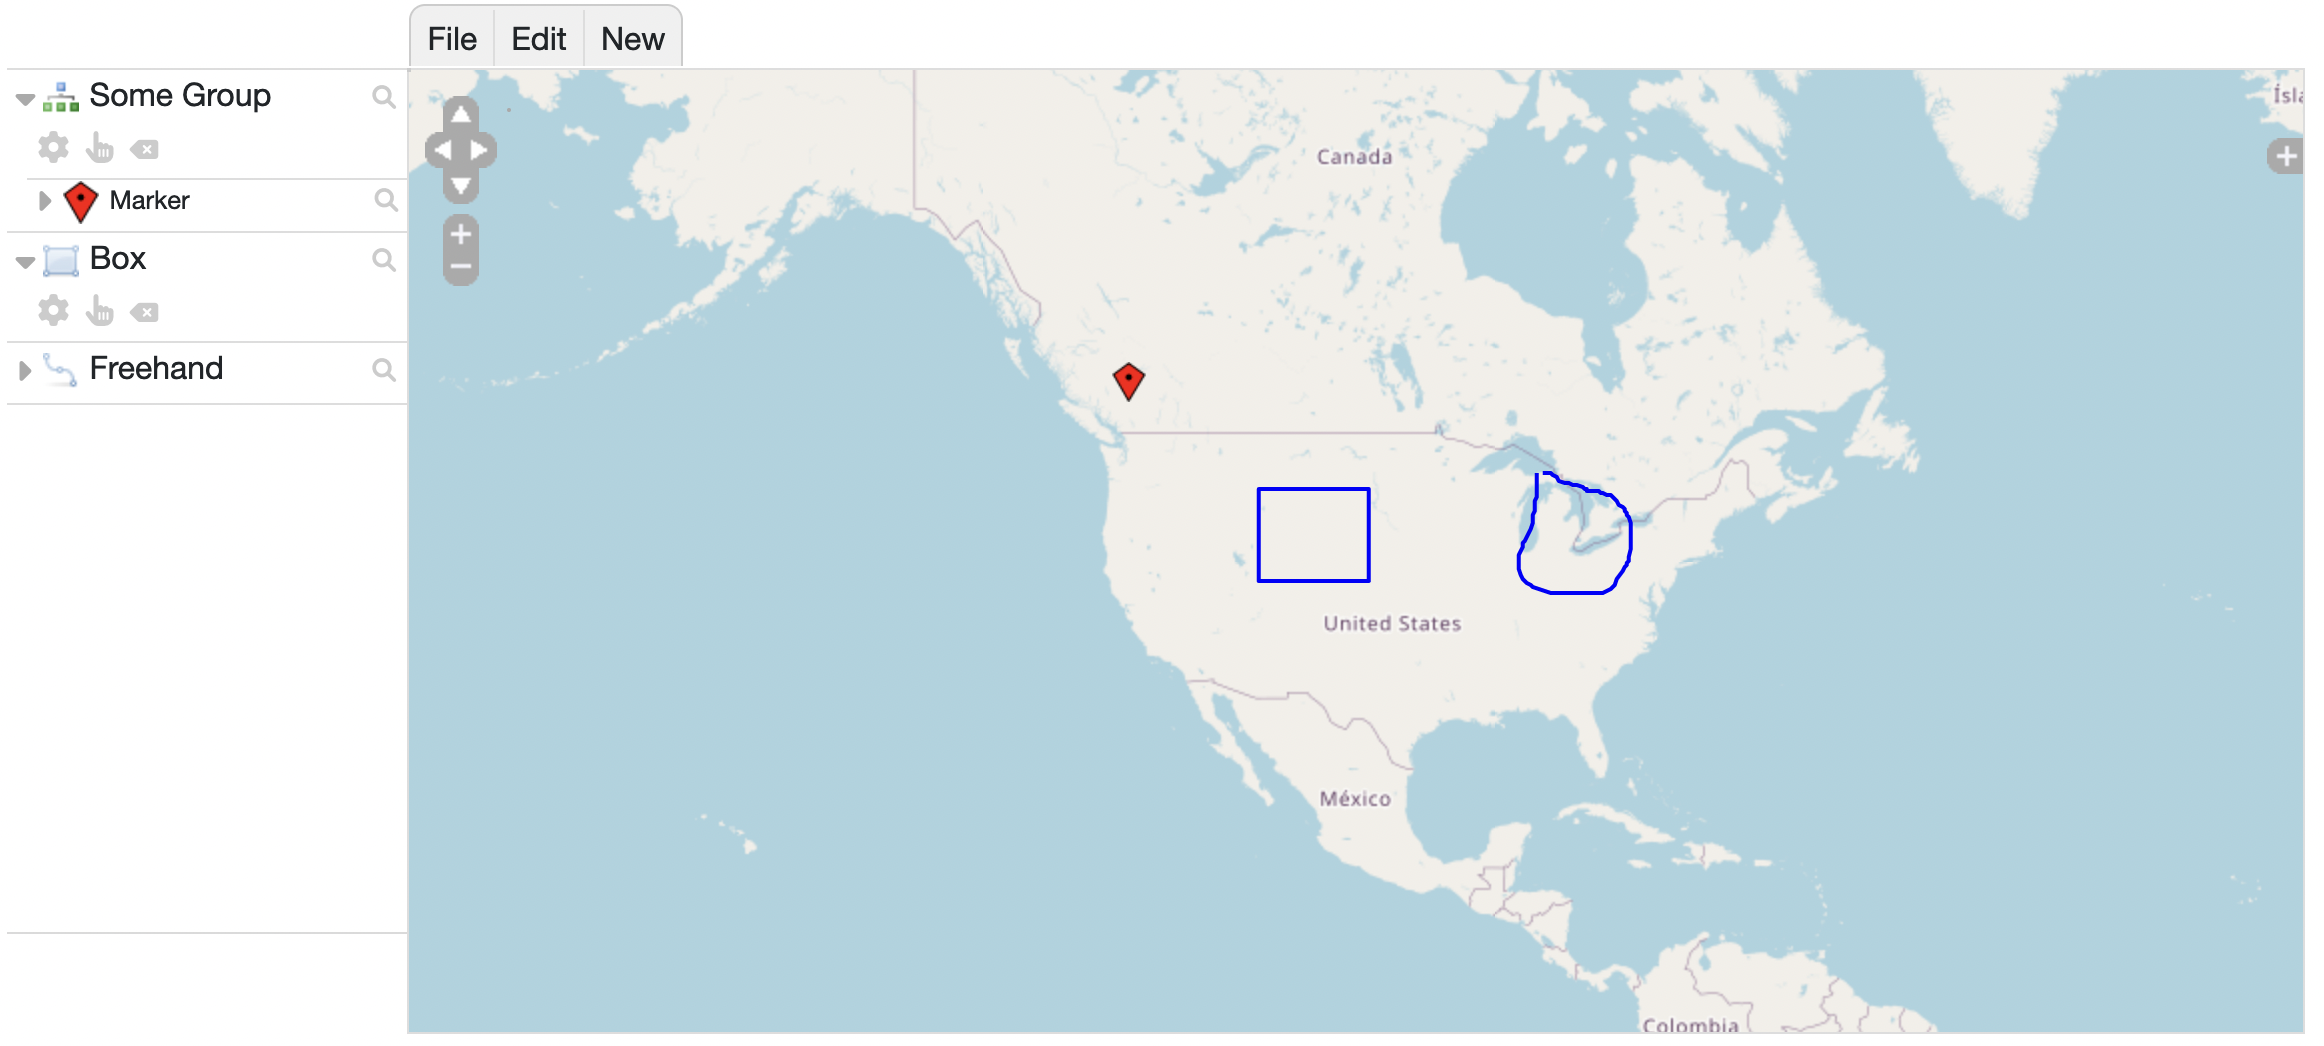
Select the New menu to see the different map glyph types that can be added.
You can add Groups, basic shapes - Marker, Label, Lines, Box, etc., Map files,
remote Map Servers, Images and other RAMADDA entries.
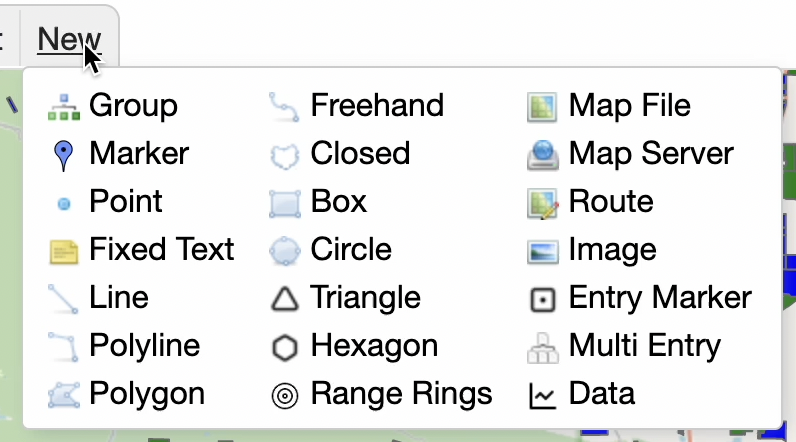 Image 5: New Menu
Selecting a shape click and/or click-drag in the map to create the shape.
Once something is created in the map a legend is shown on the left.
Here we have created a Group called "Some Group", a Marker, a Box and a Freehand glyph.
The glyphs in the legend can be dragged and dropped to reorder. You can also
drag a glyph onto a Group to add the glyph to the group.
Clicking on the toggle arrow (
)
shows more details for the glyph. The
link
takes brings up an edit window for that glyph. This allows you to specify
the drawing style and other properties.
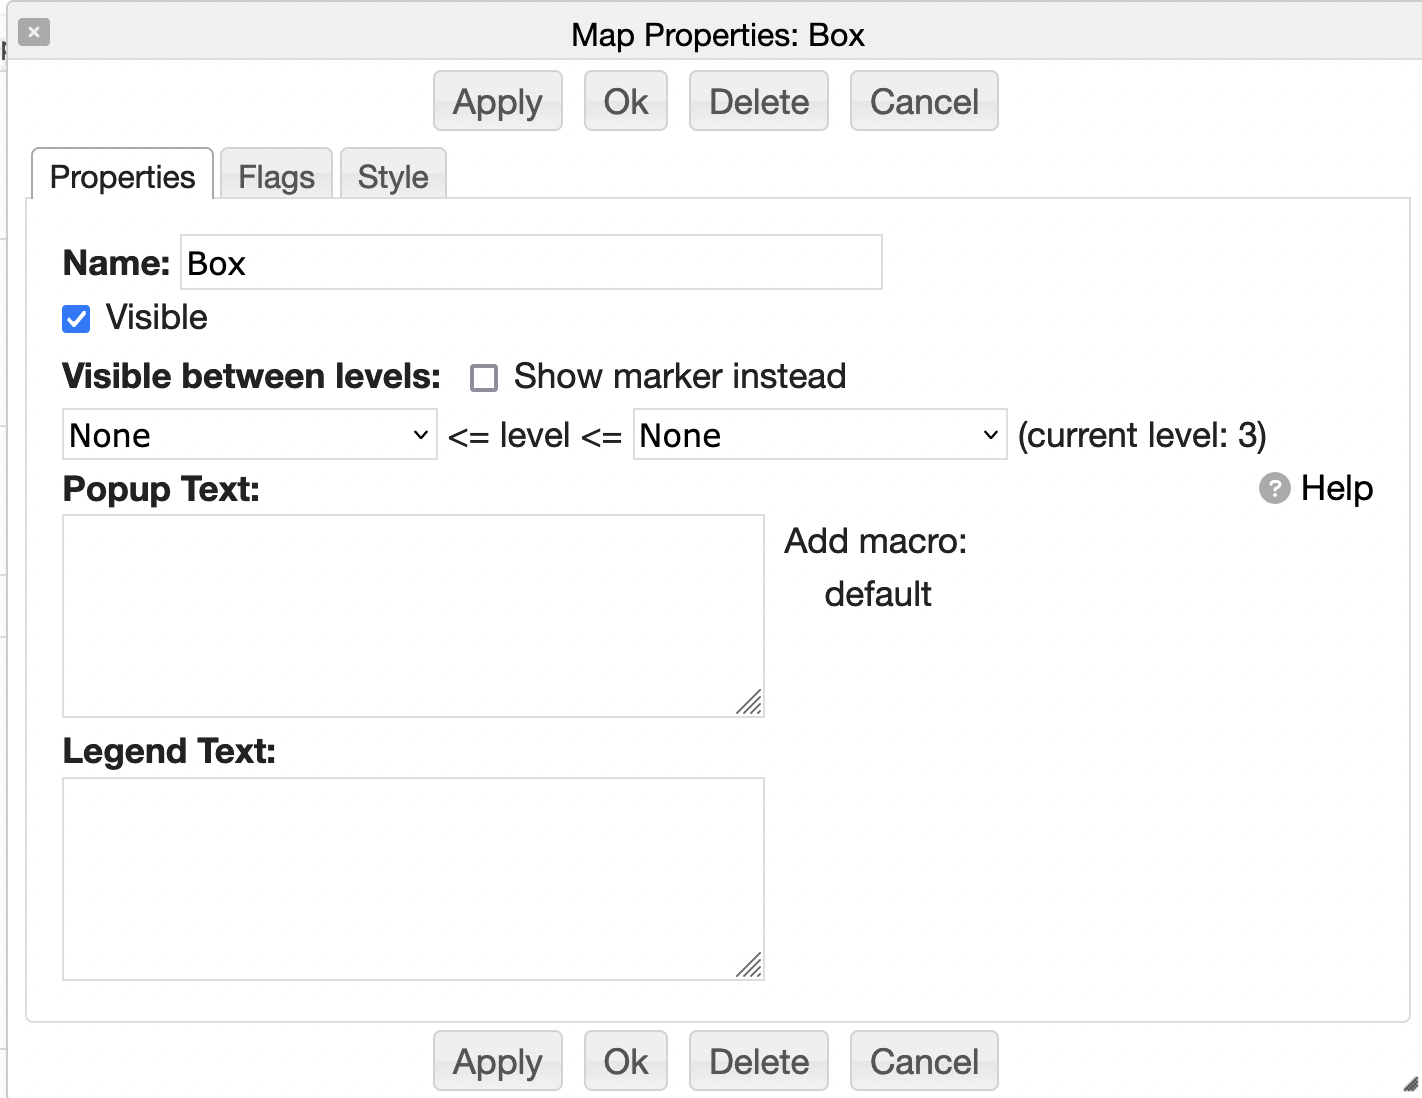
The main Properties tab allows you to change the name of the glyph,
toggle the visibility and specify what zoom levels this glyph is
visible in. This allows you to, for example, specify that when the
map is zoomed out the glyph won't be shown.
The popup text is the text shown when the user clicks on the glyph.
The legend text is just extra text shown in the legend.
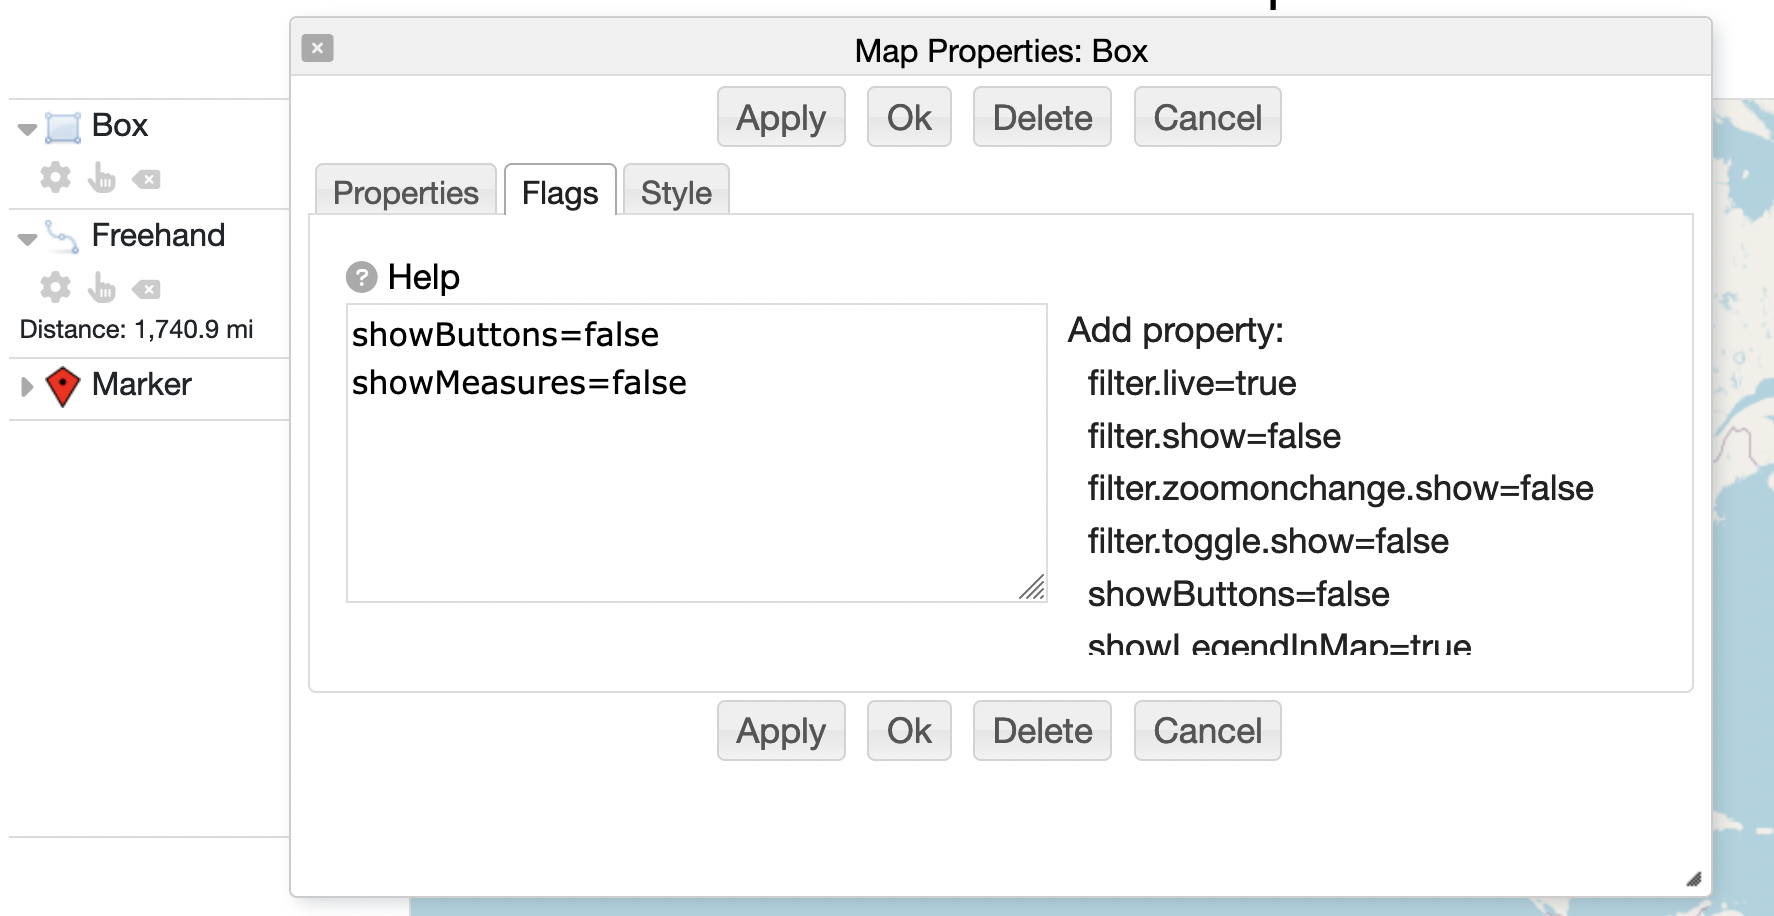
The Flags tab allows you to specify a number of extra flags or properties
for this glyph. For example, below the showButtons and showMeasures are both set to
false. With showButtons the button links in the legend won't be shown for non-logged in users.
The showMeasure=false says to not show the distance and dimensions in the legend.
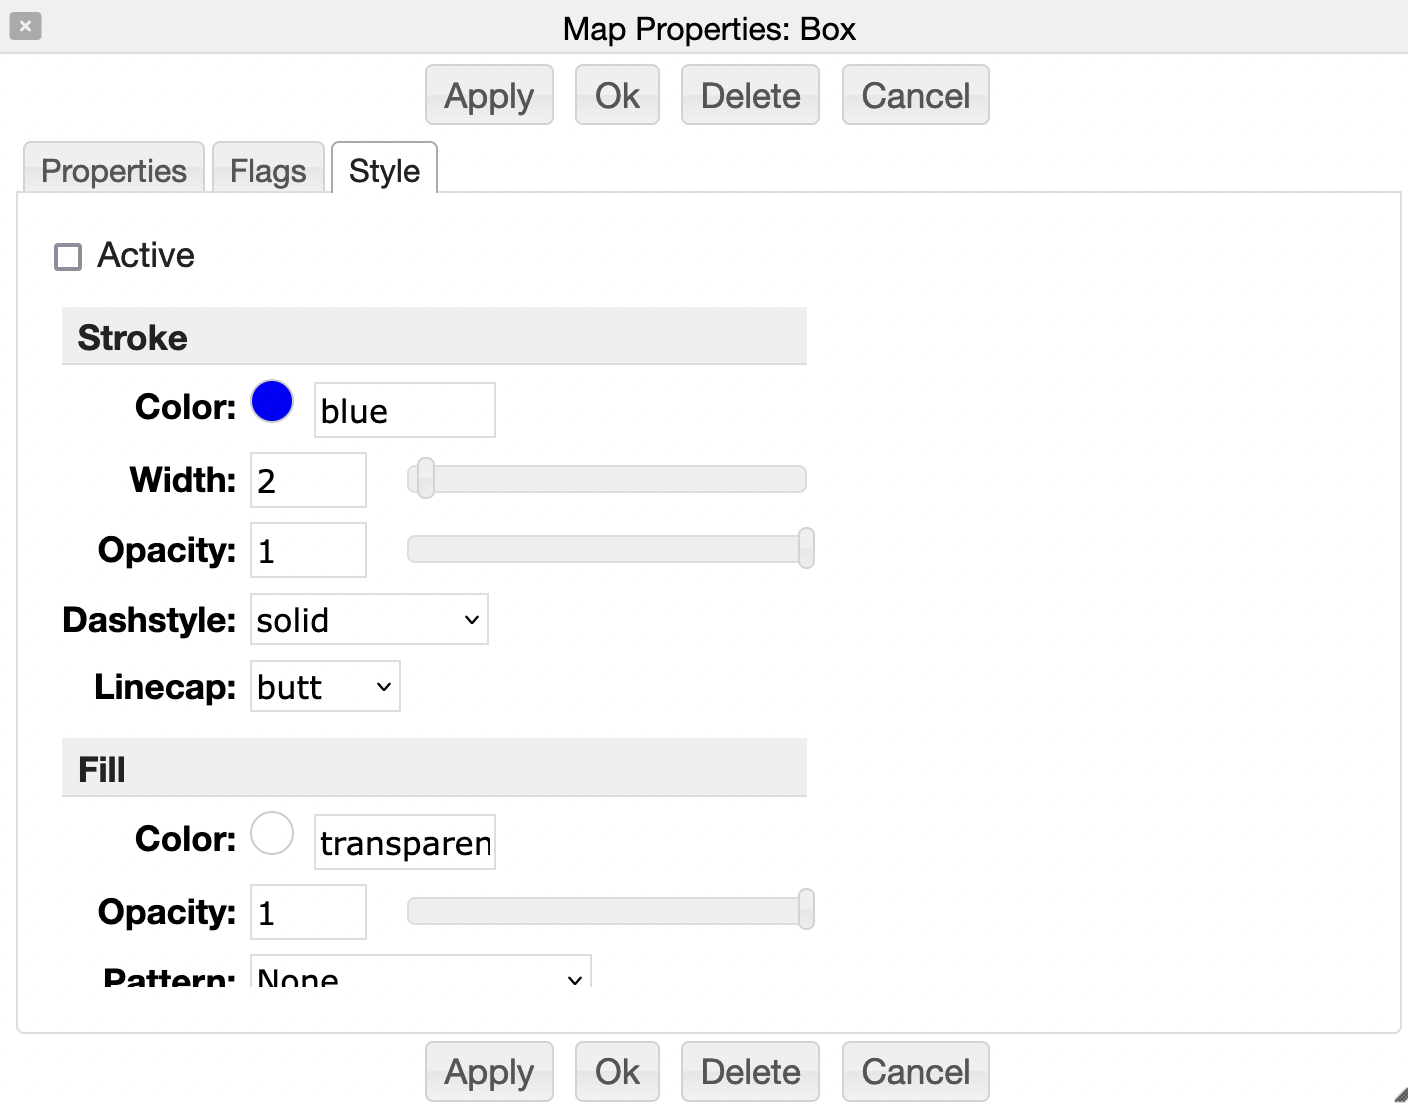
The Style tab provides settings that control the drawing style of the glyph.
These settings can vary depending on the type of the glyph.
The Active button, if set, will apply the style to the glyph when it is changed in the form.
The style tab for the Group will contain all possible styles.
Clicking on the
icon for any one style will apply
that style to all of the contained glyphs within the group.
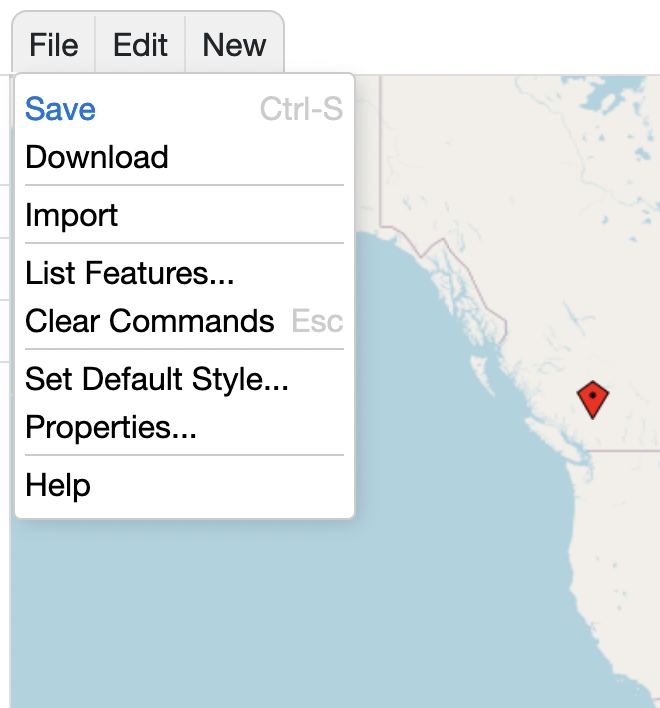
The File menu allows you to Save the map. The map is saved as a JSON file associated with
the IMDV entry. This file can be downloaded and added to make a new IMDV entry.
Other actions include:
- Import - Select another IMDV entry to import its map from
- List Features - Shows an alternative to the legend
- Clear Commands - clear out the current command (e.g, New Marker)
- Set Default Style - Show the Style dialog that is used for any new glyphs
The Properties link brings up the Properties dialog for the IMDV map.
You can:
- Show Opacity Slider - for any images this changes the opacity
- Show Graticules - show lat/lon lines
- Show Mouse Position - show lat/lon of mouse
- Show Address - Show an input that allows for searching for addresses
- Legend Position - Select where the legend should be shown
- Show Base Map Select - show a menu in the legend to set the base map
- Header/Footer - add wiki text to show above and below the map
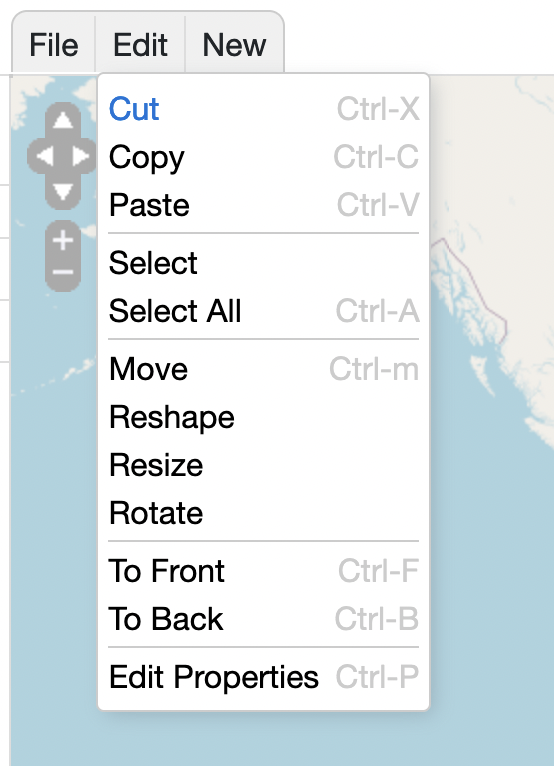
The Edit Menu allows you to select glyphs, cut/copy/paste, move/reshape/rotate, etc.